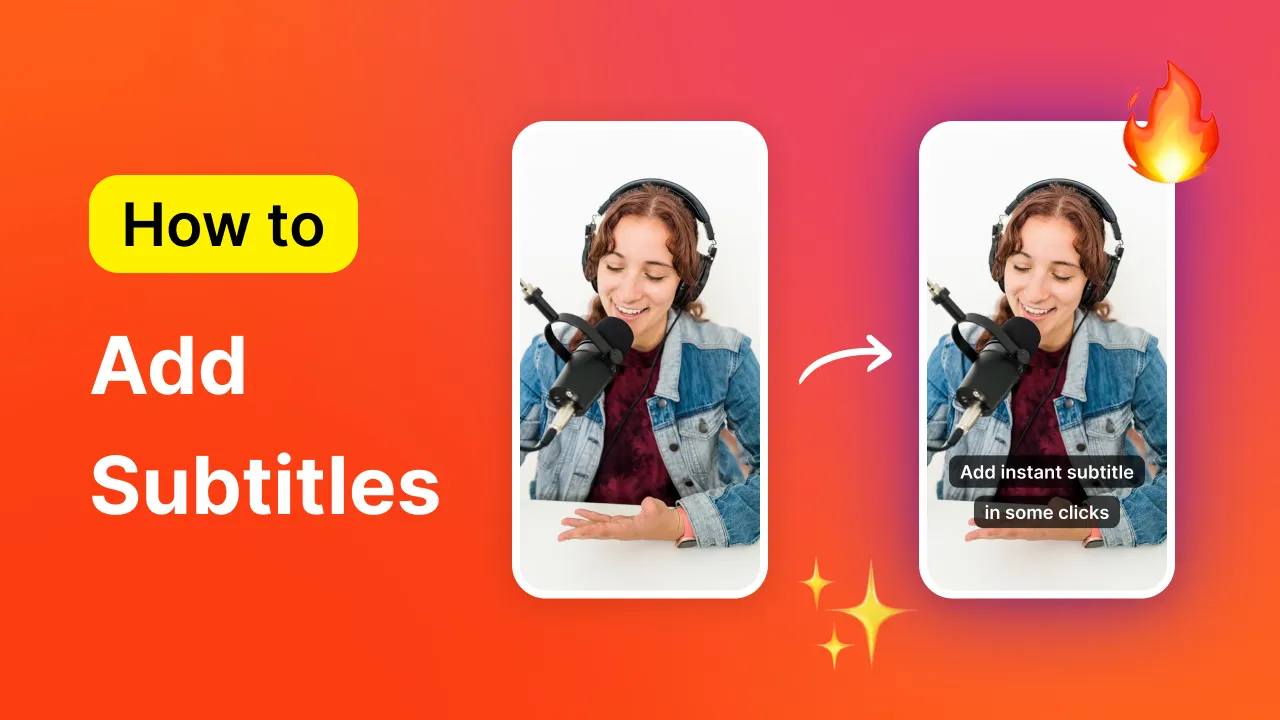
In this article, you will uncover the secrets behind these captivating subtitles and, most importantly, learn how to replicate these trendy captions on Samsung/Iphone and Desktop using 3 user-friendly tools: CapCut, Premiere Pro, and Submagic.
These tools will allow you to effortlessly add subtitles to an MP4 file and achieve the same level of impact. 🔥
News (2025): At Submagic, we now have 4 new Hormozi styles you can try now! Upload your video and export it for free to test!
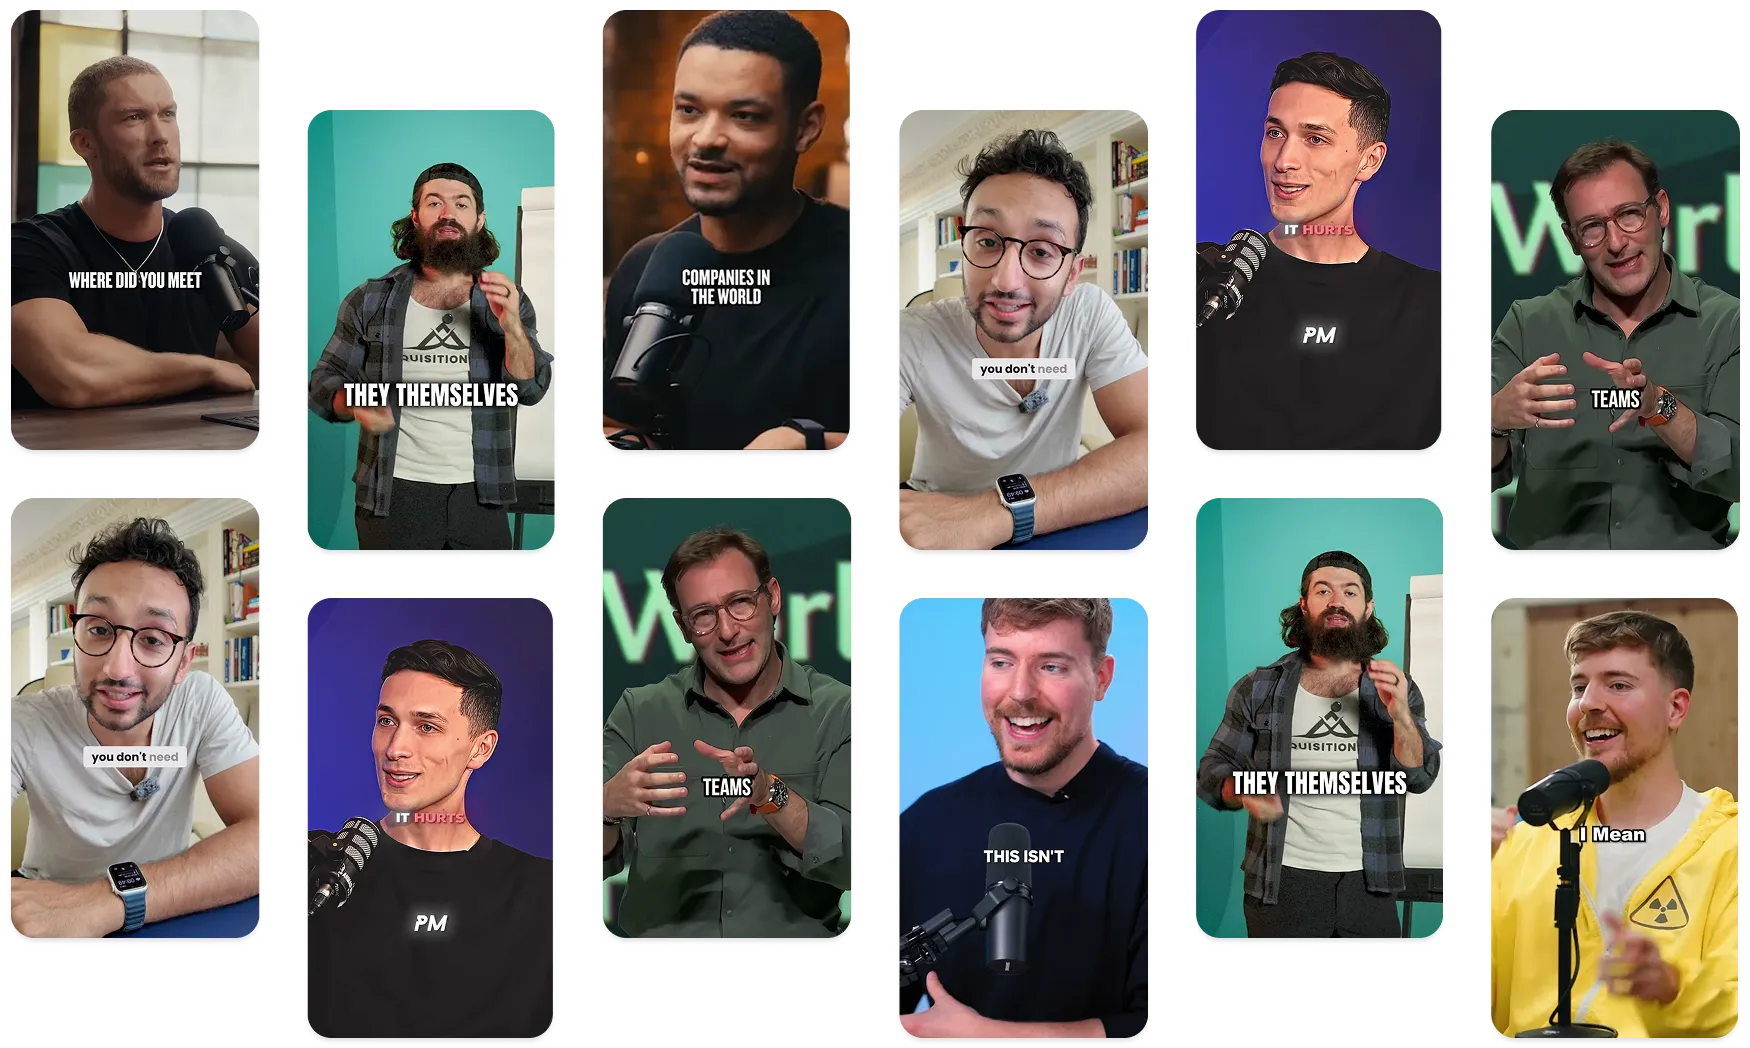
What font does Alex Hormozi use?
Over the years, Alex Hormozi used different subtitle fonts and styles. Let’s have a look at the old one, and the new Alex Hormozi caption font!
Old Alex Hormozi text font
This style is definitely the most famous one that you have seen thousands of times on Tiktok and other platforms.
If you have to replicate it, you probably don’t know all the characteristics!
Font: TheBoldFont (Alex Hormozi Font Download)
Details: Text in uppercase, put shadow, no stroke.
New Alex Hormozi text font
Hormozi’s TikTok font changed recently, and believe it or not, it’s one of the greatest style I’ve seen on socials.
Fun fact: Alex Hormozi might have the same editor as his wife, Leila Hormozi, who has the same subtitle template and font!
Font: Anton (New font to download)
Details: Text in uppercase, put shadow (a little bit), yellow stroke, pop-in effect from bottom to the top.
How to Make Alex Hormozi Captions? (3 Easy Ways)
#1 Use Submagic.co: the fastest captioning software
Now, you may say that it should take hours to replicate this type of captions. Not anymore. Submagic is an app to add subtitles to videos for free, which only takes 2 minutes for you!
Step-by-Step Guide for generating your captions.
1. Upload Process
- Search for “Submagic.co” directly from your favourite web browser – or click here.
- Click on “Create my video now” - upload your video without subtitles.
- Upload your video.
2. Generate unique and top-notch subtitles
- Add your personal touch and personalise your subtitles
From changing the colour, the animation, the emojis, the timing when the text appears, to switching to another font, you can personalise everything and make your video unique!🎨
Submagic subtitle editing tool- Download the video and your captions are ready!
You can find this button at the bottom of your project’s page. In a few minutes, you’ll receive your video with your beautiful captions. Enjoy
{{cta-richtext}}
#2 Add stylish subtitles on Premiere Pro: step-by-step guide.
1. Create the transcription.
- Import Your Clip.
- Go to the very top to "Window".
- Scroll down to "text".
- You'll see a text panel appearing, click on "Create Transcription".
- Hit "Transcribe".
- Review your text, delete all comma and points, and when that's done click on "Create captions from transcription".
2. Hit the Preferences Tab:
- Put Maximum length in characters to 15.
- Put Minimum duration in seconds to 2 seconds.
- Click on Double Line.
3. Process to set the Alex Hormozi subtitle style. 🔥
Preview of what you should see now. Complete timeline view on Premiere ProYou should now see a caption track in your timeline.
- Select one of the captions that has two lines, go up to “window" and go down to “essential graphics”.
- Once the panel is open, go to the “edit” section and clock on "Track Style" and hit "Create Style". Rename it "Alex Hormozi Captions".
- To the right of your new style there is a little arrow pointing to the top "called push". Click on it and then click on "All captions on track". Click OK.
- Now add the same options as the following screens:
Edit section on essential graphicAppearance, stroke,background, and shadow on essential graphicsN.B: If you do not know how to add the Montserrat Font into Premiere Pro, watch this 40-second-youtube-video.
4. Add colours to keywords.
Change color with the "essential graphics" section- Double click on the text, put on the video, take the keywords you want to colour, and change the appearance by changing colours in the "Fill" colors. Do this for each of your sentences.
-Highlight all your captions, click on "Graphics and Titles" at the top of your screen, scroll down to "Upgrade caption to graphic". Now these are Text Layers.
5. Add some animations. 🤯
- Add Animated Emojis
- You simply have to put your emojis wherever you want.
- Add animations to your emojis.
N.B: You can find some animations on the Internet (such as Motion Array)
#3 Generate your subtitles on Capcut (mobile version). 📱
1. Generate the transcription.
- Import your clip.
- Tap on the video, "text" and then "Auto Captions".
2. Apply the Hormozi style. 🎨
- Change the font to "The Bold Font" with this link.
- Increase the shadow and apply the same effects as the following screen (Opacity: 100% - Blur: 70% - Distance: 14% - Angle: 10%).
- Hormozi's editor uses a maximum of 4-6 words for 2 lines. Here's what you should see:
Bold Font- Now, go back to your timeline, and split the texts in half.
For instance, look at the following screens. Split the text by half after hearing the word "Sell". And now, delete the words after “Sell” in the first half of your captions section, and delete the words before “Sell” in the second half of your captions section...
First HalfSecond HalfThen, for each captions, put the text in two lines (apply the same process everywhere). 🚀
- Make the subtitles bigger.
- Change the colors of the keywords.
- If you want to make some keywords bigger as Alex Hormozi is generally doing, split your caption exactly at the time you say the word, and make the keyword of the second part bigger.
- Animate your text by clicking on "Animation".
- Add emojis and animate them. 😀
I know... it's mind-blowing, isn't it? 🧡Alex Hormozi in 2025
Alex Hormozi is a successful entrepreneur and investor known for scaling multiple businesses to great heights.
He expanded his expertise by founding and scaling three companies across different industries, generating over $120M in cumulative sales.
Alex also achieved notable exits, including a majority sale of his licensing company for $46.2M in 2021 🤯
Alongside his business ventures, Alex is dedicated to promoting equal access to education and fostering entrepreneurship in underprivileged communities.
In 2025, Alex Hormozi, it’s:
- 1,100,000+ followers on Tiktok
- 3,200,000+ followers on Youtube
- 3,400,000+ followers on Instagram
How to Edit Videos Like Alex Hormozi?
Wondering where Alex Hormozi's video editing style comes from? There is one guy behind it that you need to know about if you’re making content.
This wizard is Ryan Magin.
Cumulating over 510,000 followers on social media, Ryan claims “Making People Go Viral”. 😎
And, there is no doubt about that when you understand that he created this Alex Hormozi-style video era that every creator is inspired by!
To emulate Alex Hormozi's editing style, follow these key techniques:
1. Use transition
- Integrate transitions like the light flare one you can see in Alex Hormozi's videos. Add these transitions between each clip to create visual interest and maintain viewer engagement (a way to master the retention rate!).
2. Show, don’t just tell
Every time Alex tells something, he will also show them edits. Try to employ visual demonstrations through video, graphics, or text overlays whenever possible to keep viewers engaged and enhance understanding. 🔥
This means enhancing your videos with B-roll footage from stock libraries or online resources like Storyblocks to add depth and interest.
News: We offer a Storyblock license for free with our Growth plan at Submagic. Check this out!
3. Add Subtitles:
Make your videos more accessible and engaging by including subtitles. Utilize auto-captioning features and refine them manually for accuracy and style.
If we go back to Hormozi’s subtitle style, he draws attention to key phrases or words within subtitles by altering their color or size. Add your personal touch with branded colors, effects, or emojis! 🧡
Frequently Asked Questions on Hormozi Videos (FAQ)
Who is Alex Hormozi video editor?
Alex Hormozi's editor is Ryan Magin, the one who created the Alex Hormozi subtitle style! If you want to replicate the same style, try out Submagic for free!
What is the best editor to edit shorts like Alex Hormozi?
You have plenty of editors online, but the ones that perfectly replicate Alex Hormozi subtitle style and edits are rare. The best software is Submagic, which edits your video in 1 click, no more!


.png)

.webp)

.webp)

.webp)